

Beyond Auto-Digitize: Advanced Techniques for Pfaff Logo Conversion
Introduction
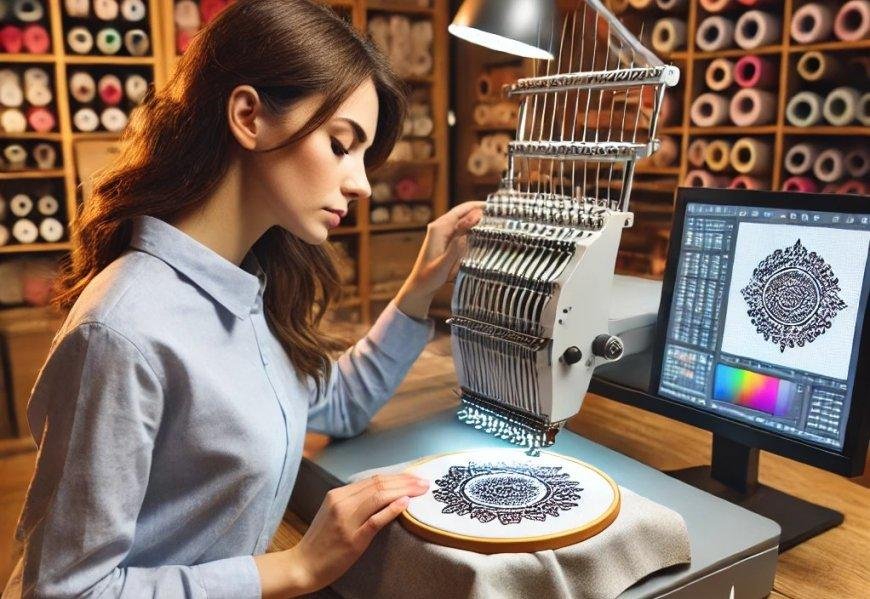
You have a crisp logo, a Pfaff machine, and a vision. You hit that auto-digitize button, and what comes out looks nothing like your brand. The edges are jagged. The letters are lumpy. The whole thing just looks wrong. I have been there, and it is incredibly frustrating. The problem is not your machine. It is the approach. Auto-digitizing is a shortcut that rarely delivers professional results, especially for complex logos. Pfaff Embroidery Logo Digitizing demands precision, planning, and a deep understanding of how stitches interact with your artwork and fabric. This guide moves beyond the basics, showing you the advanced techniques that separate amateur results from professional-quality embroidery on your Pfaff machine.
Why Auto-Digitize Fails for Logos
Many digitizing programs offer auto-digitizing tools. They promise to convert your logo with a single click. But here is the problem. Auto-digitizing algorithms are not smart enough to understand the intent behind your design. They treat your logo like a random collection of shapes, not a carefully crafted brand identity.
Auto-digitizing makes several critical mistakes. It often misinterprets shadows as extra colors, creating unnecessary thread changes and increasing stitch count . It fails to apply proper underlay, which is the foundation that prevents shifting and puckering . It sets the wrong stitch density, leading to thread breaks or gaps. It ignores fabric behavior, treating a stretchy polo the same as a stiff hat. And it does not optimize stitch paths, creating unnecessary jump stitches and trims that waste time and thread. The result is a design that runs poorly, looks unprofessional, and fails to represent your brand accurately .
Master the Pfaff File Formats
Before you digitize, you need to understand what your Pfaff machine actually reads. Pfaff machines do not use image files like JPG or PNG. They need specialized embroidery formats that contain stitch commands. The most common Pfaff formats are VP3, VIP, HUS, and PCS .
VP3 is the recommended format for most modern Pfaff machines. It preserves thread color information and notes, making it superior for multi-color designs . The mySewnet guide specifically states that "the preferred file format for exporting embroideries is Husqvarna Viking / Pfaff .vp3, as this will preserve the thread color information and notes" . VP3 also supports splitting for multipart hoops, which is useful for large designs that exceed a single hoop area .
Your digitizing software should support exporting to VP3 or VIP. If you are using mySewnet or Wilcom, make sure you select the correct Pfaff format when saving your file . The wrong format can cause your machine to reject the file or stitch it incorrectly.
Advanced Digitizing Techniques
Now let us get into the techniques that will transform your logo conversion from passable to perfect.
Start with Clean Artwork
The quality of your final embroidery starts with the artwork you feed into your digitizing software. High-resolution vector files like AI, EPS, or SVG are ideal because they scale infinitely without losing quality . If you only have a JPG or PNG, make sure it is sharp with good contrast. Remove any backgrounds, shadows, or gradients that will confuse the digitizing process. Simplify fine details that are too small to stitch clearly. Text smaller than a quarter inch often turns into unreadable blobs, so consider enlarging those elements.
Assign the Right Stitch Types
Auto-digitizing often misassigns stitch types. To get it right, you need to manually assign the correct stitch to each element of your logo.
-
Satin stitches are ideal for text, borders, and thin outlines. They create a smooth, raised edge that catches light nicely and gives a professional finish.
-
Fill stitches, also known as tatami stitches, are for large filled areas. They create a woven texture that covers the fabric without becoming too dense.
-
Run stitches are used for fine details and outlines. They are a single line of stitching that follows a path.
The Pfaff software documentation confirms that a good digitizer will assign specific stitch types, directions, density, and underlay to different parts of the design . This manual assignment is what separates a professional file from an auto-digitized mess.
Set the Right Stitch Density
Stitch density controls how close together the stitches are placed. Auto-digitizing often gets this wrong, leading to puckering or gaps. A digitizer's goal with non-lace embroidery designs is to create a beautiful piece with as few stitches as possible. For logos, you want the density to be high enough to provide good coverage but low enough to prevent thread breaks and fabric distortion.
Different fabrics require different densities. A dense fabric like denim can handle tight stitches, while a stretchy knit needs looser density to avoid puckering . The Pfaff manual suggests that "the stitch density for embroidery is generally in the buttonhole range," but you should adjust based on your specific fabric . Always test your design on a scrap piece of the same fabric to check density.
Apply Proper Underlay
Underlay stitches are the hidden foundation of good embroidery. These stitches go down first, stabilizing the fabric before the top stitches appear . Without proper underlay, designs can shift during stitching, edges can misalign, and fills can pucker.
Auto-digitizing often skips underlay or applies it incorrectly. Manual digitizing allows you to adjust the underlay type and density based on your fabric . For stretchy fabrics, you need a more substantial underlay. For stable fabrics, a lighter underlay may be sufficient.
Account for Pull Compensation
Pull compensation is an advanced technique that accounts for fabric distortion. When you stitch into fabric, the thread tension pulls the material together, compressing the design . This is especially noticeable on stretchy fabrics. Pull compensation widens certain areas ahead of time so they end up the correct size after stitching. This step separates professional files from amateur attempts. In the Pfaff Q&A, an expert recommends using the underlay and compensation options to fix issues with fill areas .
Optimize Stitch Paths and Color Order
A good digitizer does not just assign stitches. They plan the entire sequence to minimize thread changes, jump stitches, and machine head movements. This is called optimizing the stitch path. The mySewnet software includes a "ColorSort" function that reduces thread color changes during export . You can also use the "Optimize Stitch Length" feature to remove small and insignificant stitches . These optimizations save time and reduce the chance of thread breaks.
Working with Pfaff's mySewnet Software
If you are using Pfaff's mySewnet software, you have access to powerful tools for logo conversion. Here are some advanced features to explore.
Stitch Length Optimizer automatically removes small and insignificant stitches. This cleans up your design and prevents issues with very tiny details that might not stitch well . You can adjust the sensitivity from Low to High.
Export Appliqué Pieces saves or prints appliqué outlines ready for cutting. This is useful if your logo includes appliqué elements .
Optimize for Sewing Options includes ColorSort and Optimize Stitch Length. These are enabled by default when saving as a VP4 or VP3 file . You can customize these options to fine-tune your design.
Splitting for Multipart Hoops is available for VP3 and VP4 files. This automatically splits large designs to fit in multipart hoops. You can use an Intelligent Split that cuts through gaps or a Straight Line Split for a straight cut .
When to Outsource
Learning advanced digitizing techniques takes time. If you are running a business, the time spent learning software could be better spent on production, sales, or customer service . Professional digitizing services have experienced digitizers who already know how to handle density, underlay, scaling, and stitch flow for different fabrics and placements.
Professional services also eliminate trial and error. Instead of fighting with software or redoing failed stitch-outs, you get a clean, production-ready file right away. Prices start at around $10 per logo, and turnaround is often within hours . For business owners who need consistent, professional results, outsourcing is the smarter choice.
Conclusion
Beyond auto-digitize lies a world of advanced techniques that transform your logo conversion from passable to perfect. Understanding the right stitch types, density, underlay, and pull compensation makes all the difference. Mastering Pfaff file formats like VP3 ensures your design runs smoothly on your machine. And using the advanced features in software like mySewnet gives you control over every stitch.
You can learn these techniques yourself, but expect a significant time investment. Or you can hire professional digitizers who do this every day and deliver perfect files for a small fee. Whichever path you choose, remember that your logo represents your business. It deserves to look its best in every stitch.
Sponsorluk
Sponsorluk
Sponsorluk
Sponsorluk
Reklam
Kategoriler
Read More
Brutal heat cancels Fourth of July events in DC and PhiladelphiaIn Washington, an Independence Day morning was cancelled "after extensive and careful consideration of the safety of our participants, spectators and staff as the top priority", organisers said. The intense heat also led to the closure of the fair on the National Mall for several hours on Friday, one day before the holiday. The...
Apple’s John Ternus will run one of the world’s most powerful companies; the job is a minefield Over his 15-year reign as Apple’s top banana, Tim Cook has become instantly recognizable, powerful beyond imagination, and exceedingly wealthy. Most estimates peg Cook’s current net worth at roughly $3 billion, assets that he amassed largely through performance-based equity awards as Apple’s market...

SpaceX backer 137 Ventures raises $700M for two growth-stage funds VC firm 137 Ventures announced Thursday that it has raised more than $700 million across two new growth-stage funds to back startups “with the potential for significant market impact.” In the past year, the firm, founded by former Founders Fund investor Justin Fishner-Wolfson, said it has deployed more than a billion...

LG G5 Series OLED TV Review: Brightest OLED Yet, Great for Gaming LG G5 Series Pros Highest brightness of any OLED TV yet Stunning image quality Cons Brightness boost not visible in all content Remote is not as good as previous versions Expensive LG G5 Series OLED TV...

Partial US government shutdown could mean airport delays, travel groups sayReutersTravel groups and airlines are warning of potential disruption as the US federal government partially shut down after lawmakers failed to reach a deal on funding the Department of Homeland Security (DHS) .Several groups, including Airlines for America, said in a joint statement on Friday that without a deal, the...